
1
Create your credentials
On the Credentials page, select Add Credentials. Pick S3 protocol or Azure protocol, then Generate an Access Key ID / Secret Access Key pair — or paste an existing one (at least 16 / 32 characters). Leave Active on, optionally enable Download the credential upon creation, and add a description so you recognize the key later.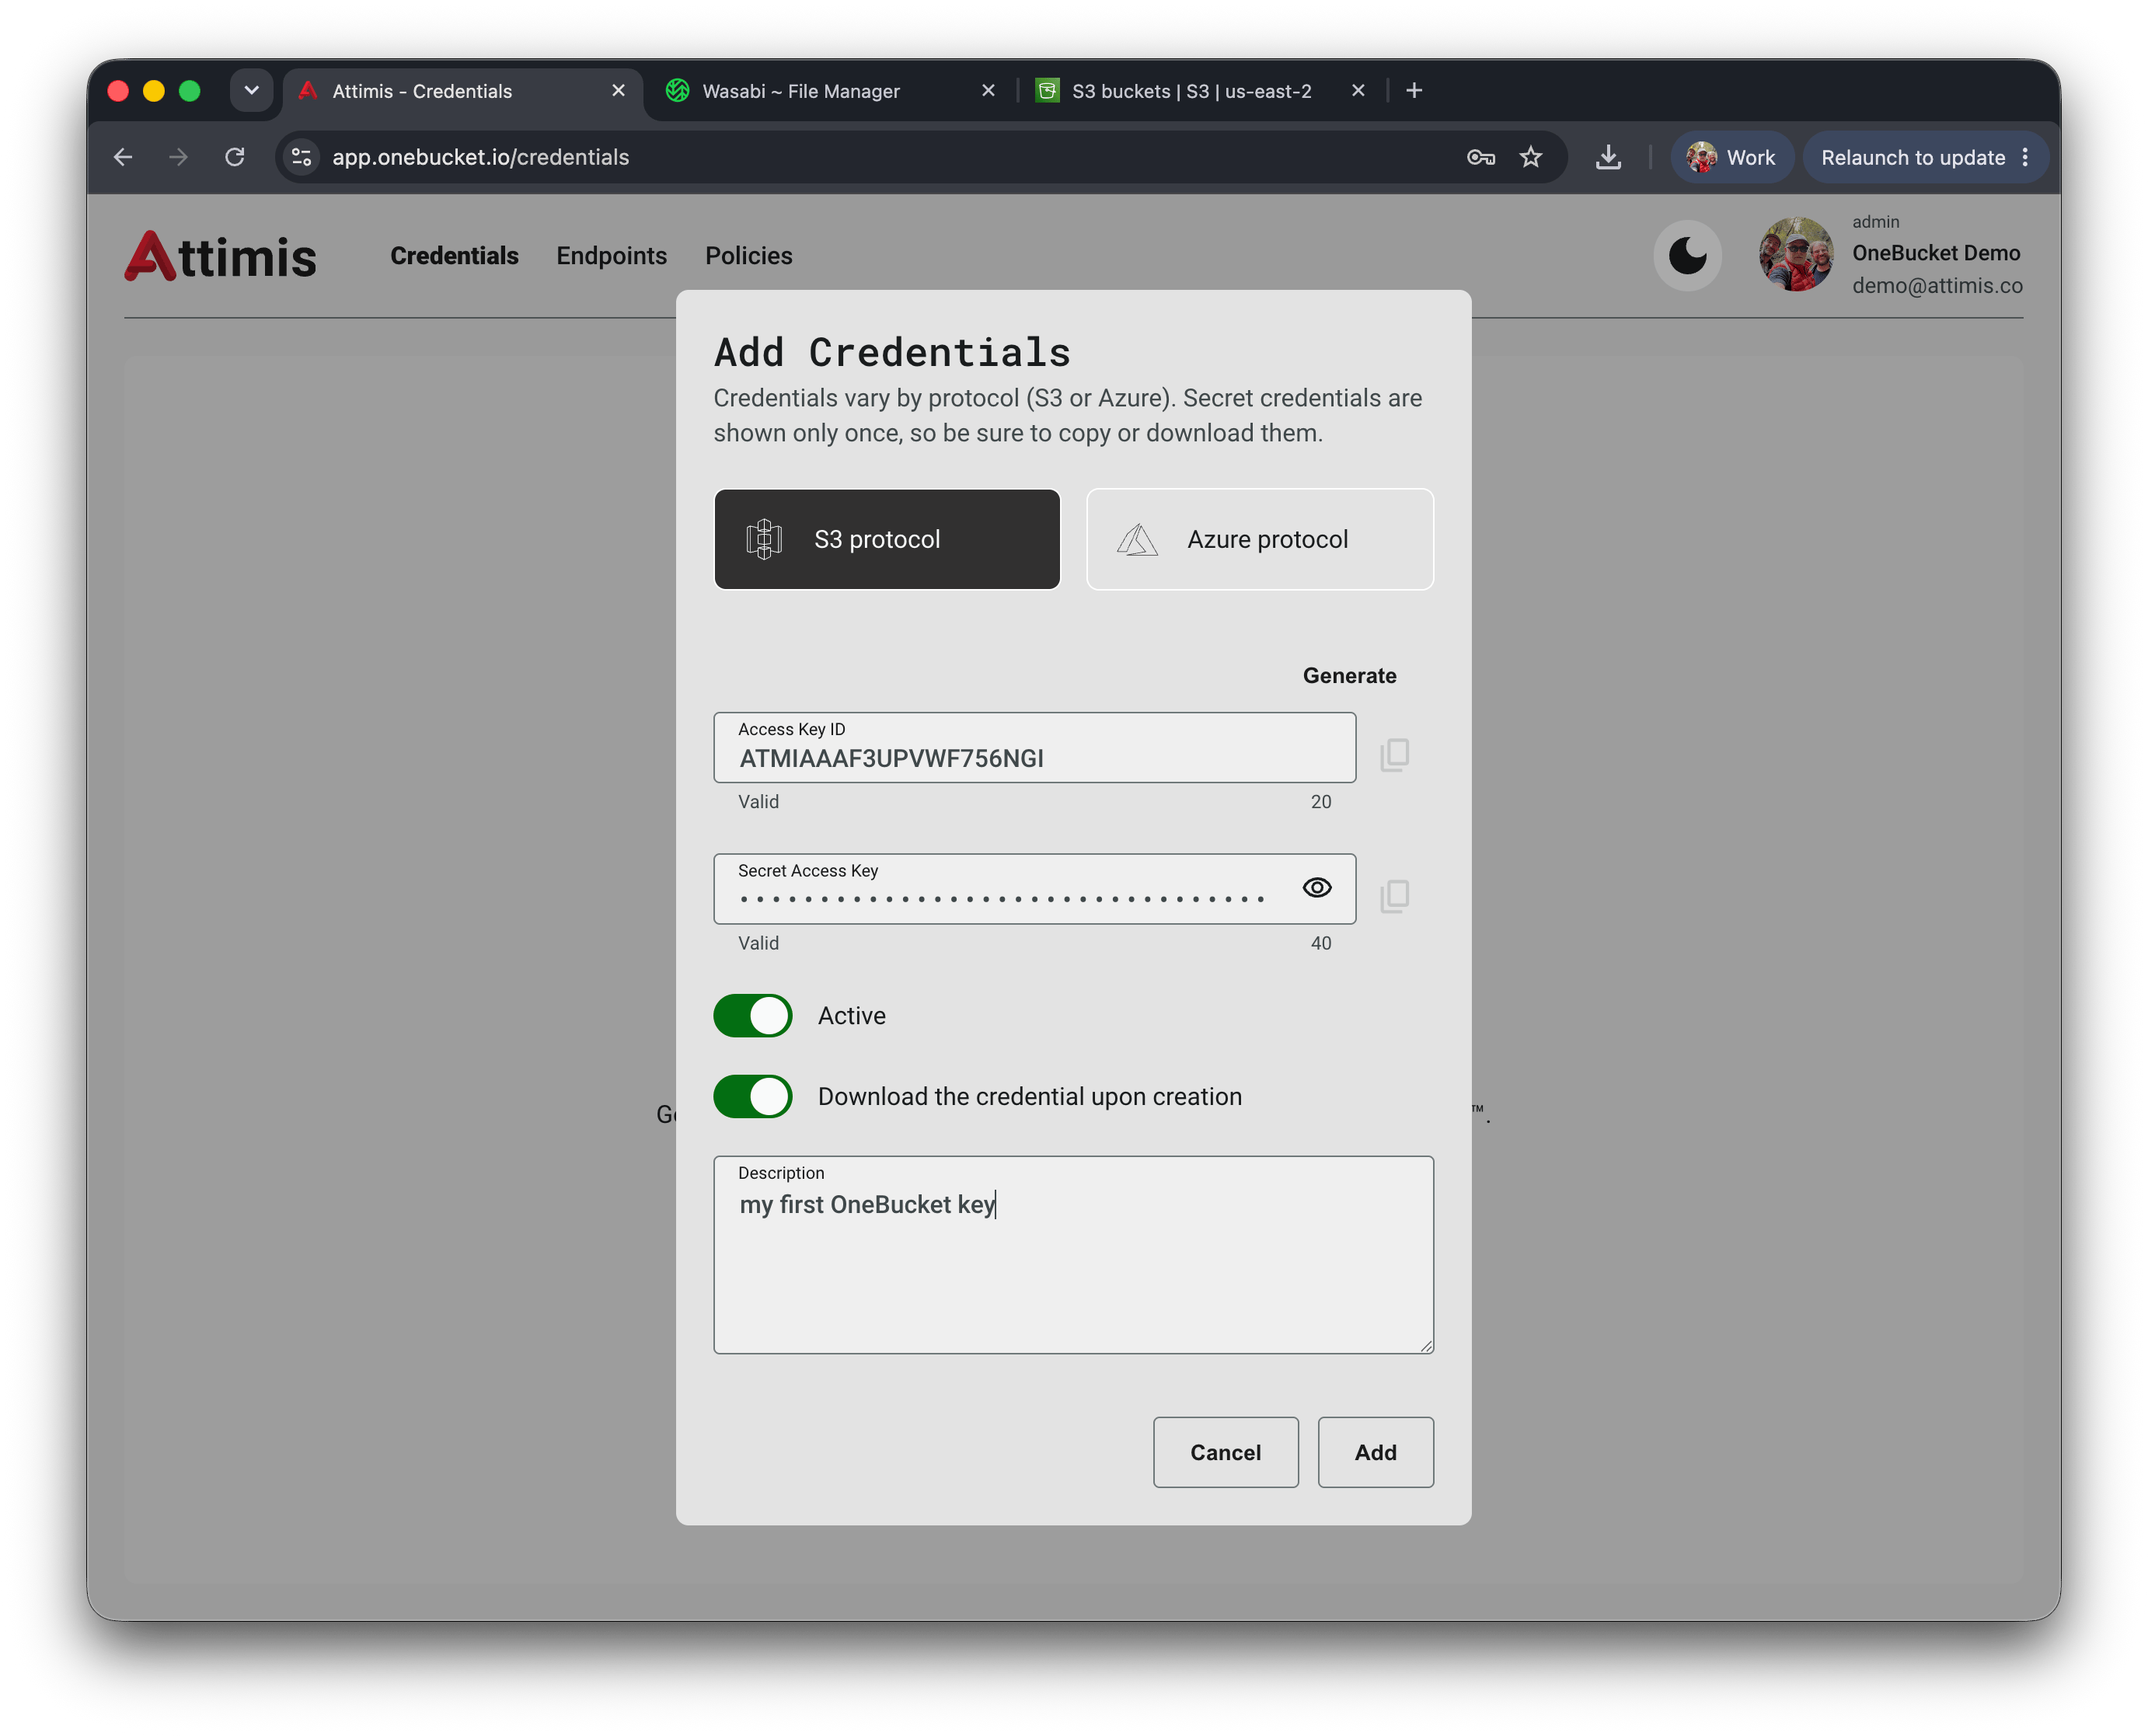
2
Add an Endpoint
On the Endpoints page, select Create Endpoint and enter the backend’s friendly name, URL(s), protocol (S3 or Azure), and bucket style (virtual-hosted or path). Then add the Endpoint’s own credentials — an existing Access Key ID / Secret Access Key (S3) or Account Name (Azure) for that store, e.g. your Wasabi keys — so OneBucket can reach it.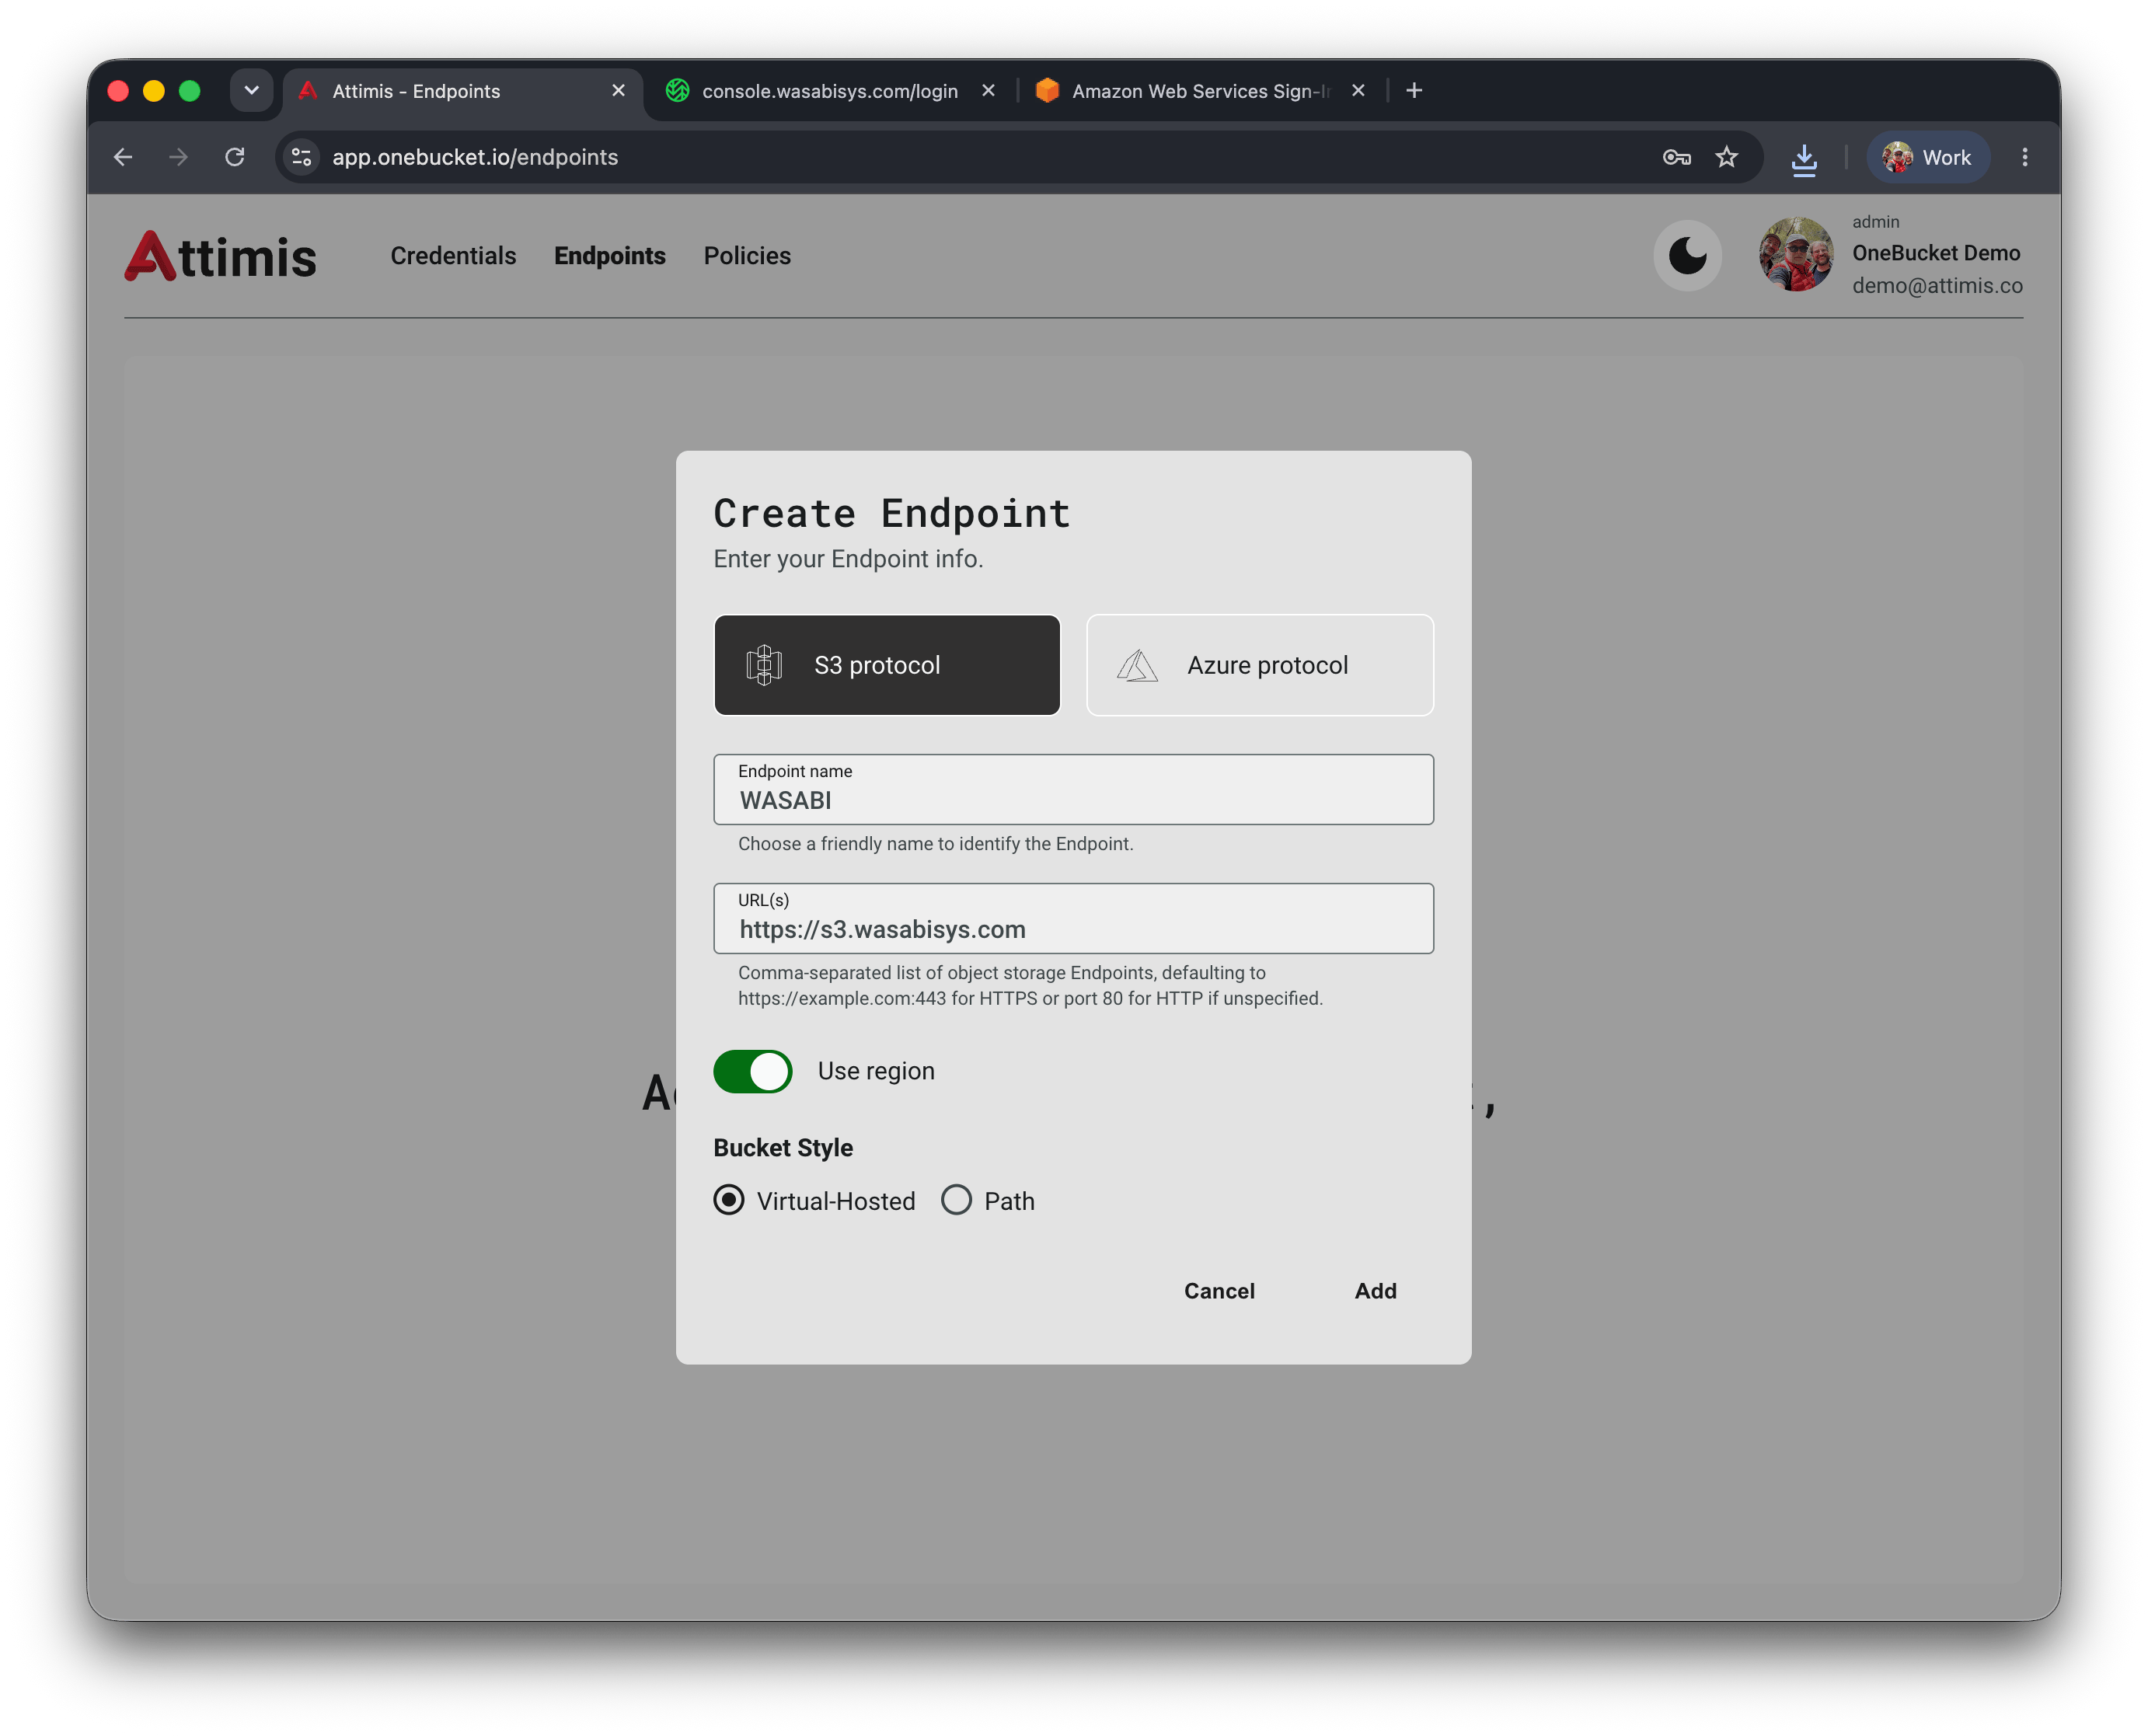
3
Create a policy
On the Policies page, select Create Policy and follow the four-step wizard: name your OneBucket™ (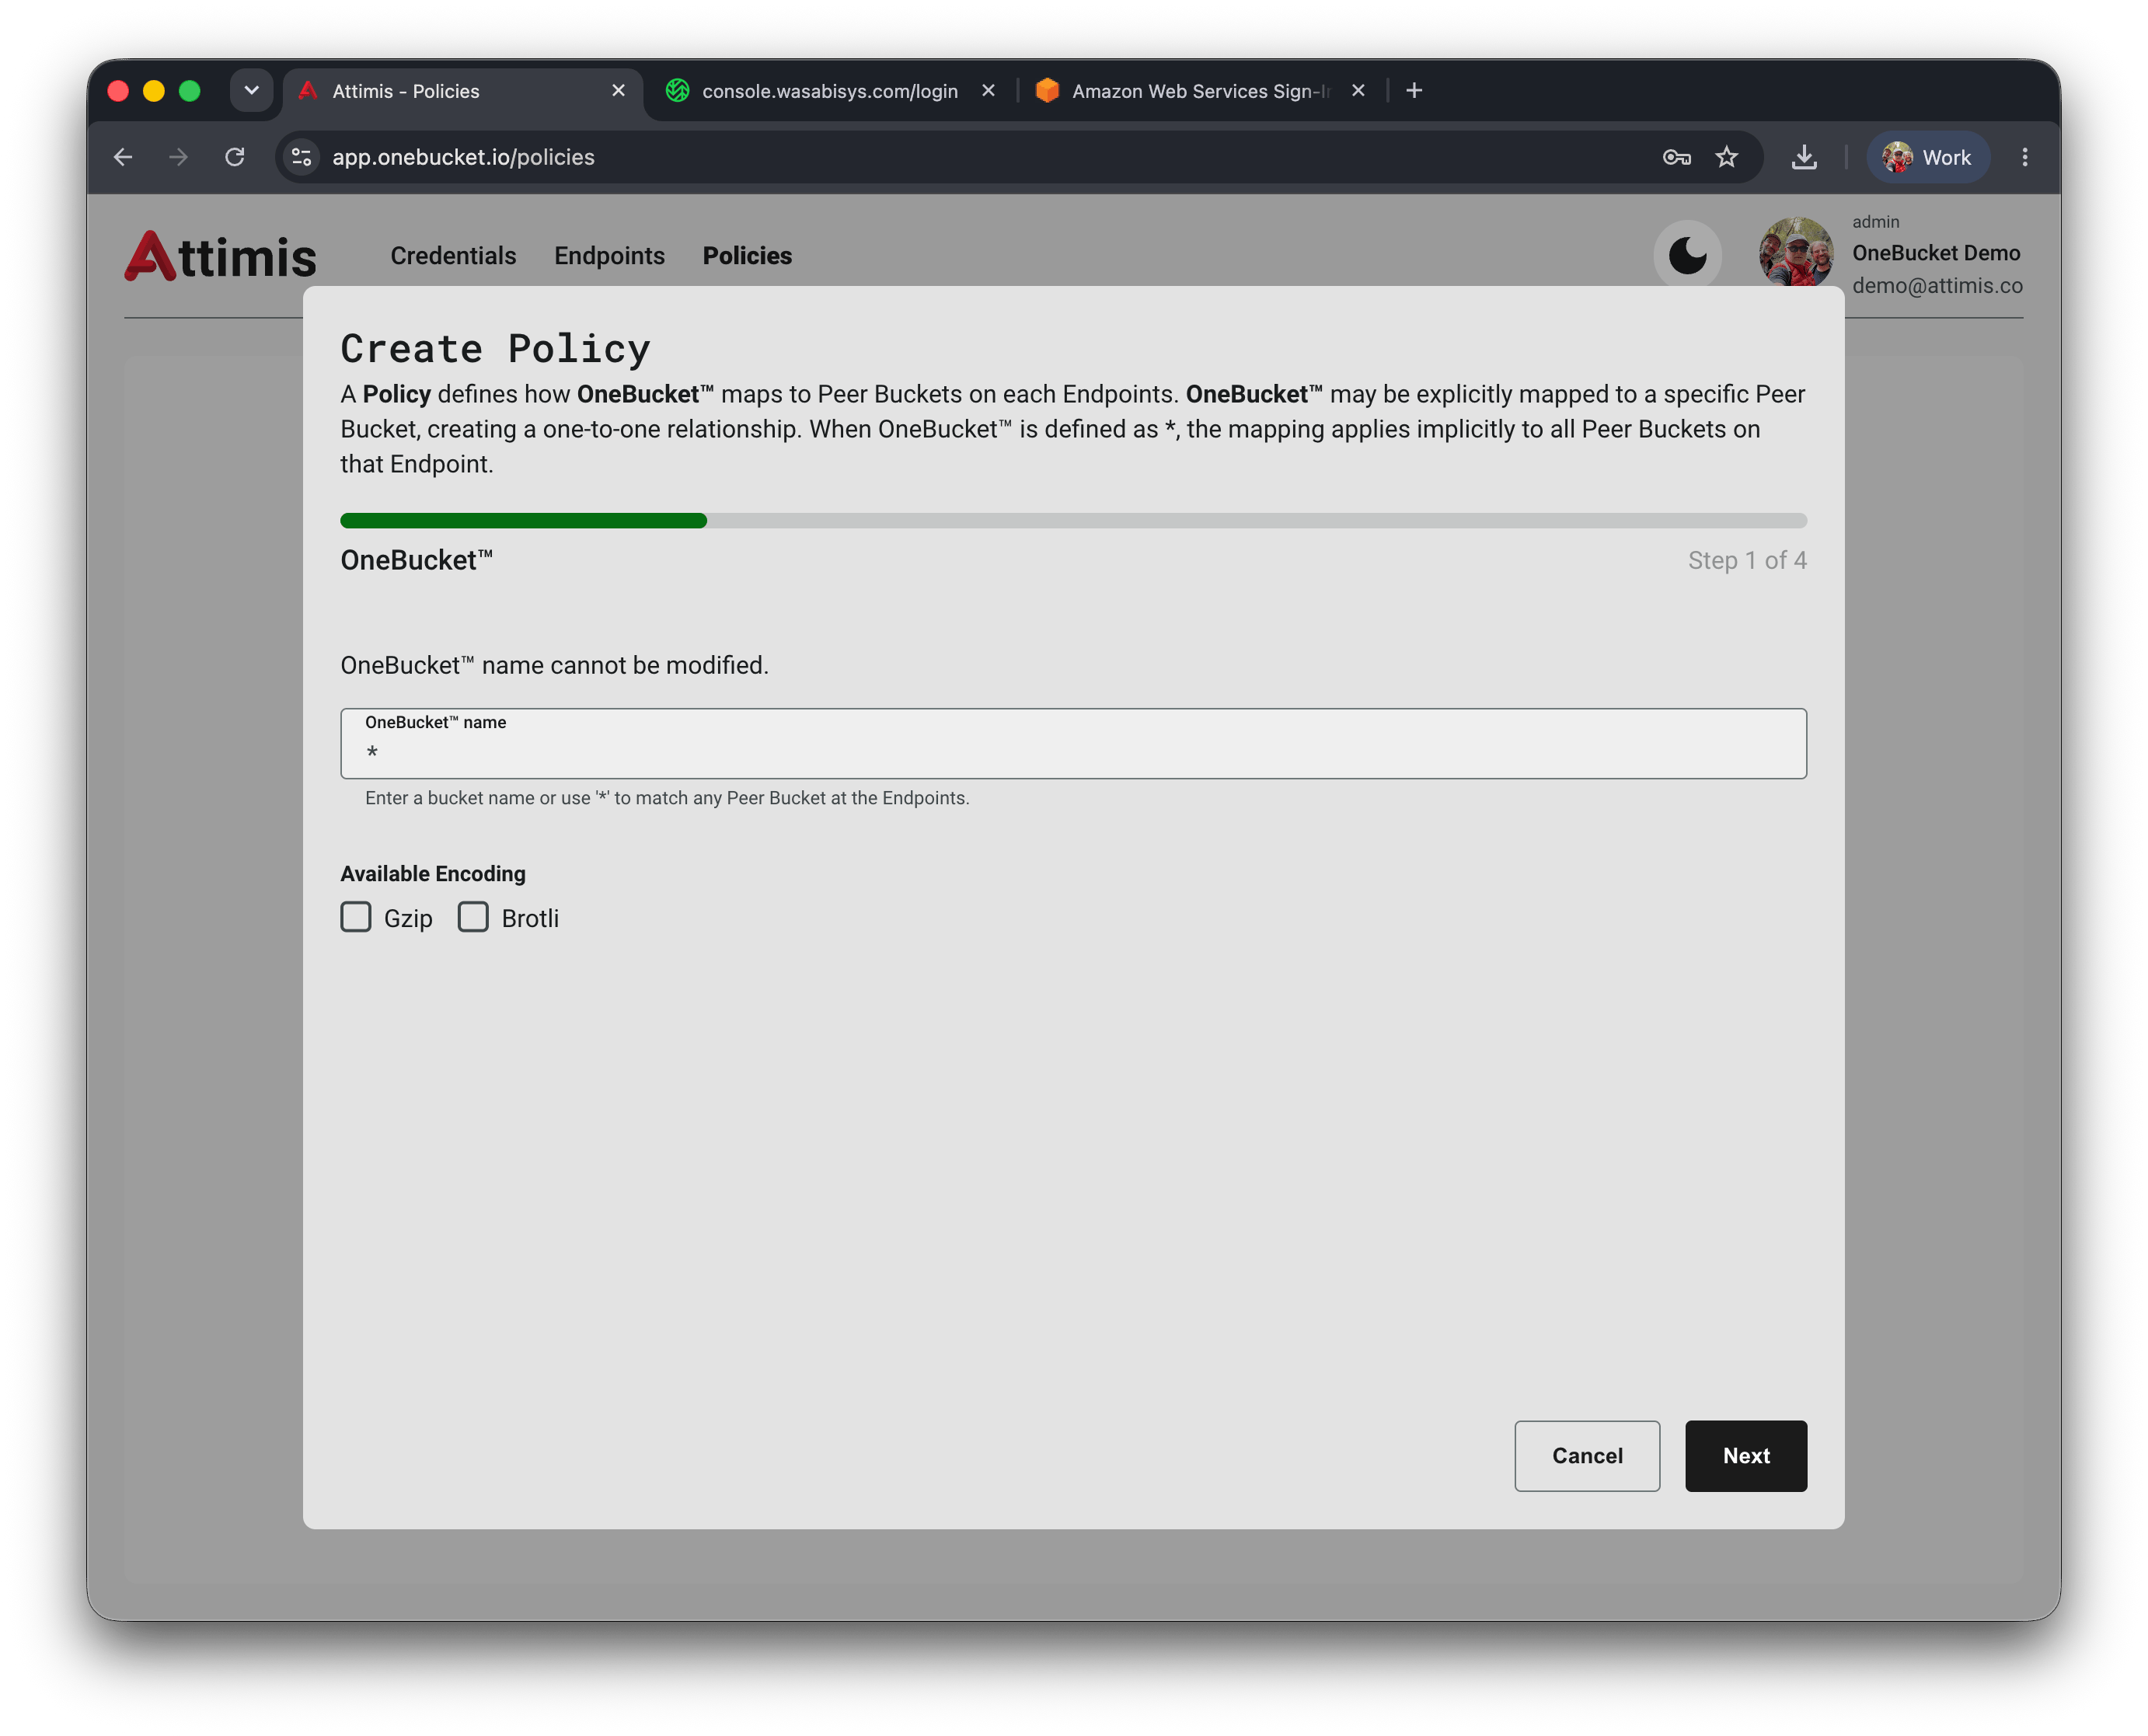
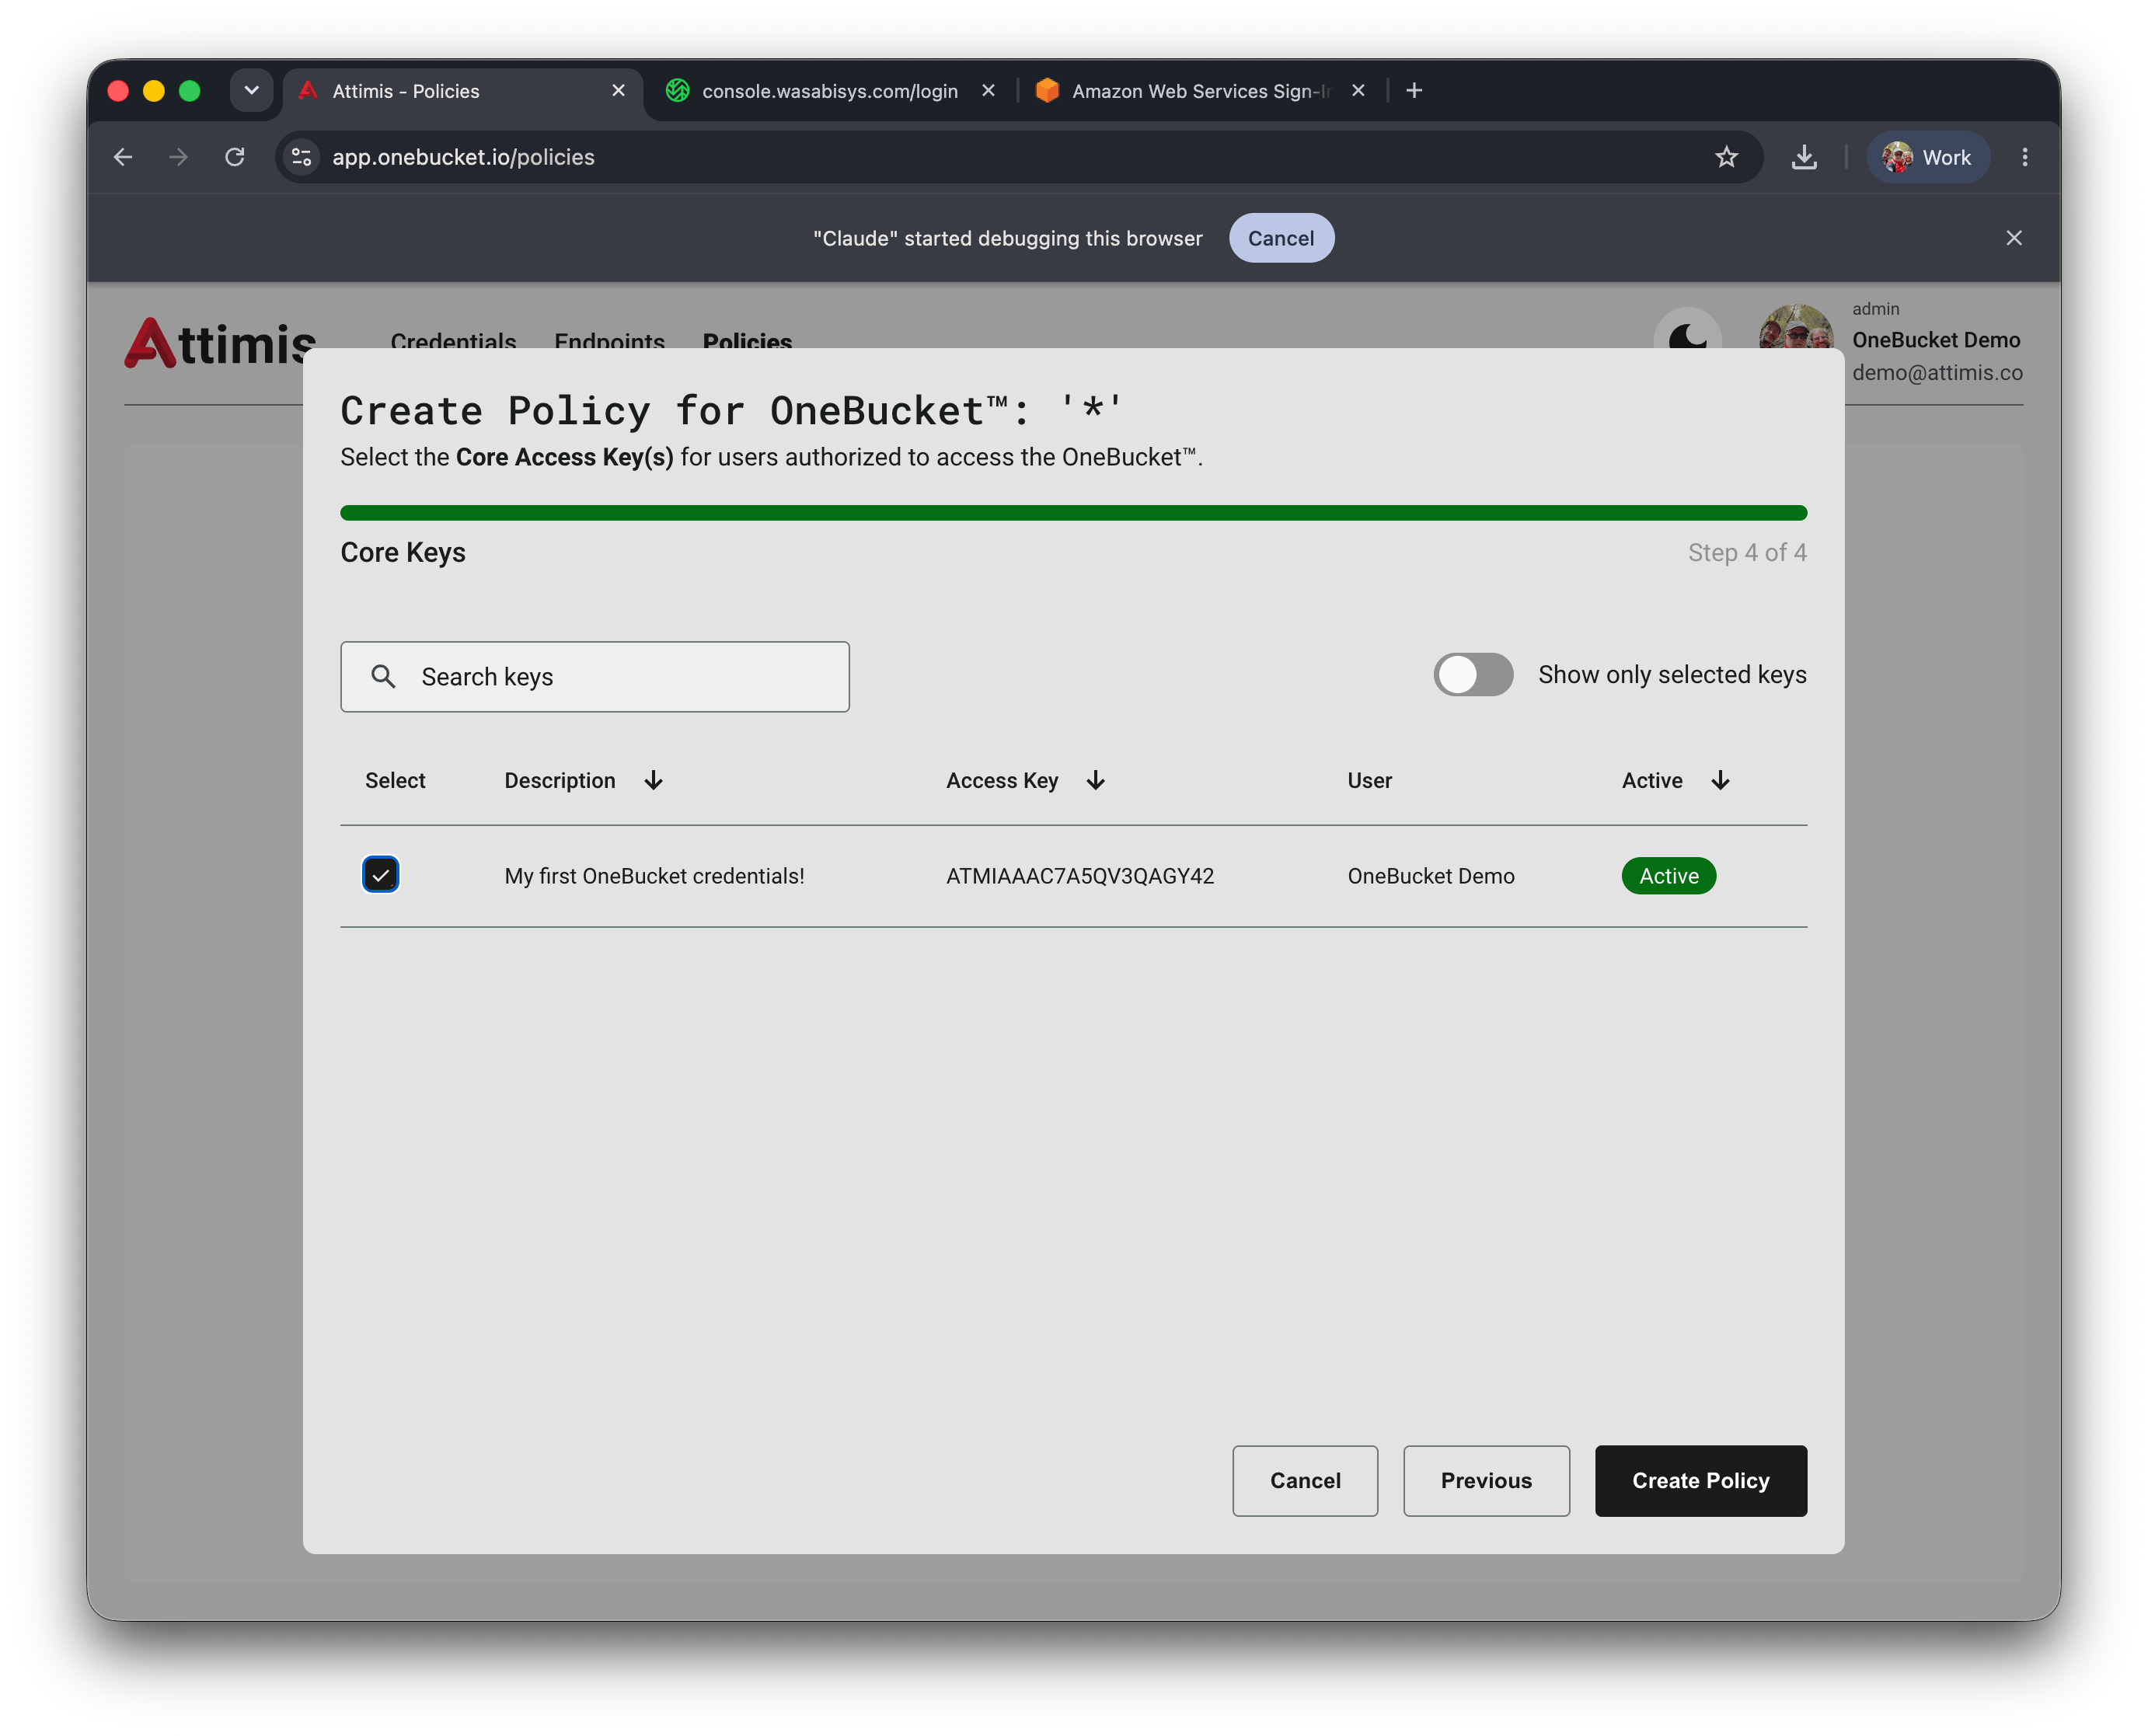
* matches any Peer Bucket at the Endpoints — the name cannot be changed later) and pick optional encodings (Gzip, Brotli); map it to one or more Peer Buckets at your Endpoints; set privileges, mode (sync, async, or cache), and the write Quorum — how many Peer Buckets with write permission must succeed; finish by selecting the Core Access Keys authorized to access the OneBucket™.4
Deploy (coming soon)
For now, active policies are applied automatically. A dedicated Deploy step is coming soon: a deployment will be a collection of policies that run, and policies without at least one active Core Access Key or one active Sync Peer Bucket will be ignored.
Next
Quickstart
Read and write your first object over S3 or MCP.